


SET UP VIA MOBILE APP
Download the “Scent Area APP”

to your android or apple device.
AP MODE (RECOMMENDED)
AP Mode: This mode will create a Wi-Fi signal from the diffuser that will show up in the Wi-Fi settings of your phone which you will connect to with the password: 1 2 3 4 5 6 7 8. Once connected you will then go through this choice through the app and program your settings. You will have to be within 10ft (3 meters) of the diffuser for this option to work. This option you can only program one diffuser at a time.
A. If you have not completed STEP ONE: SETTING THE DIFFUSER CLOCK please go to top of page and follow steps to first make sure the clock is set to your local time.
B. Power on your Diffuser, then locate the Blossom’s Aroma Reservoir making sure the machine has at least 50ml+ of oil in it. WARNING* DO NOT ADD WATER this is a waterless OIL ONLY diffuser. Use Official Bloom Aromatherapy oils for best results as they have been formulated specifically for our cold air diffusers.
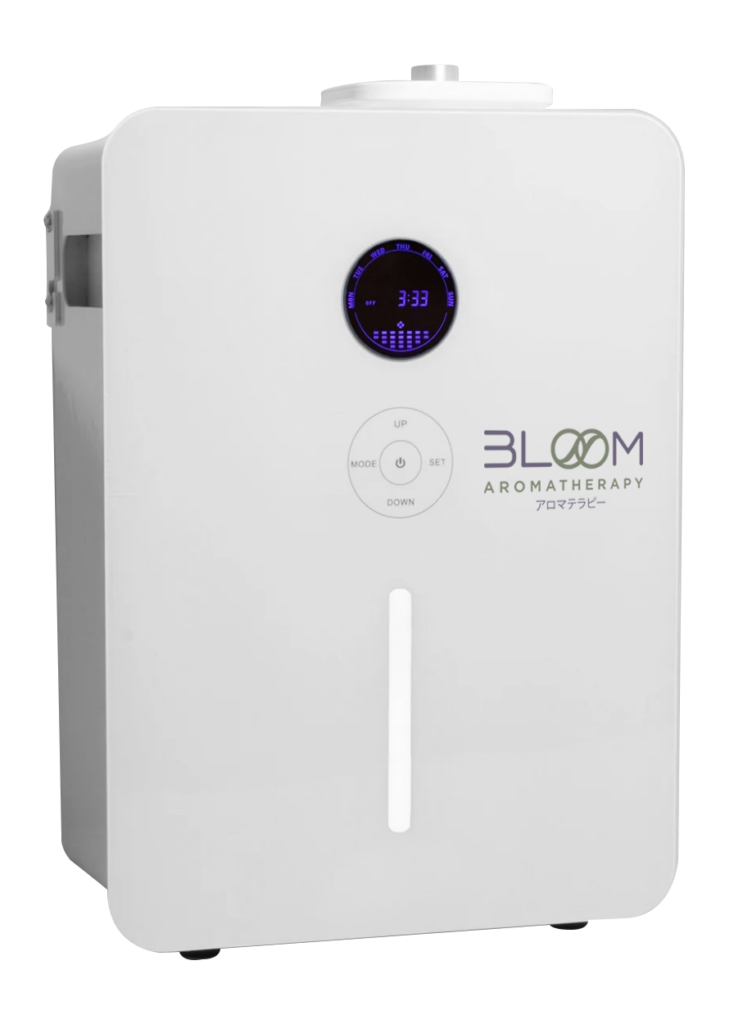
C. Power on BLOSSOM. Press and Hold the “UP” button on front of diffuser.
D. Go to Wifi Settings on your mobile device and connect to the diffusers local Wifi “M50_AliOs” When prompted for a password enter: 1 2 3 4 5 6 7 8
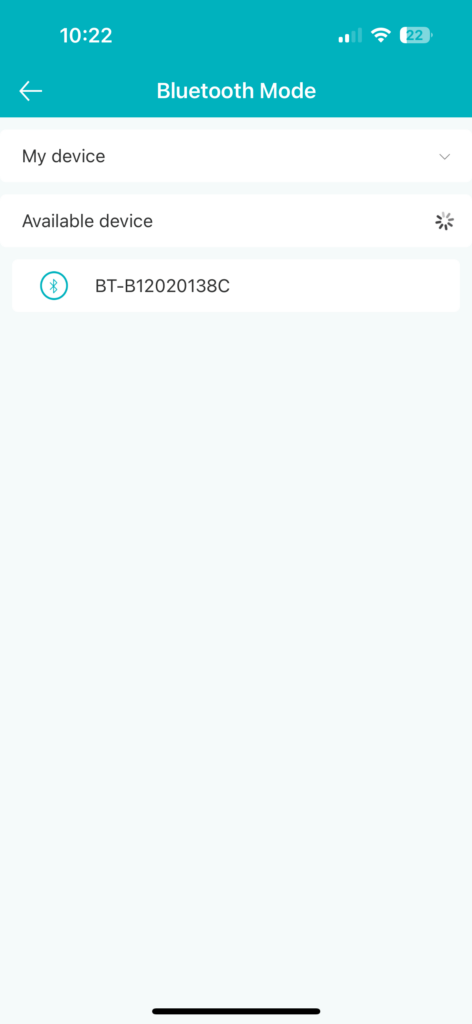
E. Now on your mobile device open the “SCENT AREA APP”, *allow app to use local connection if it prompts. “CLICK AP MODE” and select the diffuser device listed.
You are now connected and can now program “Event On/Off” Schedule for diffuser to automatically operate during selected days and times.
*Never Turn OFF FAN in settings.
WIFI MODE
Wifi Mode: This mode will connect to your designated Wi-Fi (whether it’s at home, work or a location you do not plan moving your unit out from). You would need to know your Wi-Fi password to proceed in this matter. This option you would be able to connect to anywhere in the world if you like to travel and want to control it – but must be near the unit to set it up first. With this option, you can connect to multiple units at a time and is a great option for commercial businesses, realtors, etc.
Download the “Scent Area APP” to your android or apple device.
A. If you have not completed STEP ONE: SETTING THE DIFFUSER CLOCK please go to top of page and follow steps to first make sure the clock is set to your local time.
B. Power on your Diffuser, then locate the Blossom’s Aroma Reservoir making sure the machine has at least 50ml+ of oil in it. WARNING* DO NOT ADD WATER this is a waterless OIL ONLY diffuser. Use Official Bloom Aromatherapy oils for best results as they have been formulated specifically for our cold air diffusers.
C. Power on BLOSSOM. Press and Hold the “UP” button on front of diffuser.
D. Open the “Scent Area App”, click through the questions and be sure you allow APP to use your location while using the app and to use local network as well.
E. Click on “Wifi Mode”; it will state for you to log in. You will first register your phone number (free sign-up if this is the option you see).
F. Once you click to “register”, a new window will appear, and you must type in your cell number to receive a SMS code. Keep in mind to change the country code to the correct country for your phone number.
G. When you receive the country code, type the provided code underneath your phone number and then hit “NEXT” (it may appear as another name depending on iPhone or Android you have)
H. A new screen will appear to create a password. This password needs to have both letters and numbers, with a minimum of 6 charters (hit next once you have created a password you will remember)
I. The new screen will appear to either scan or Add Equipment. You will press “Add Equipment”
J. This will go to a screen where you will see that you are connected to “YOUR Wi-Fi” and will ask for you to enter that password (please be sure you know your password).
K. Enter the password and then “Press and HOLD” the “MODE” button on your diffuser until you hear it beep about four (4) times (release/let go) once you hear it beep, press “START CONFIGURATION” on the app. *This step may have to be repeated if the password was typed incorrectly or you did not press the mode button in time.
L. It takes about a full minute to connect, and you should see a prompt that appears and says connection successful (it may differ depending on the iPhone and/or Android)
M. You will then hit the “back button” to where you previously seen “Scan or Add Equipment.” Underneath those options, “Device 01″ should now appear as an option. “Click” on that option.
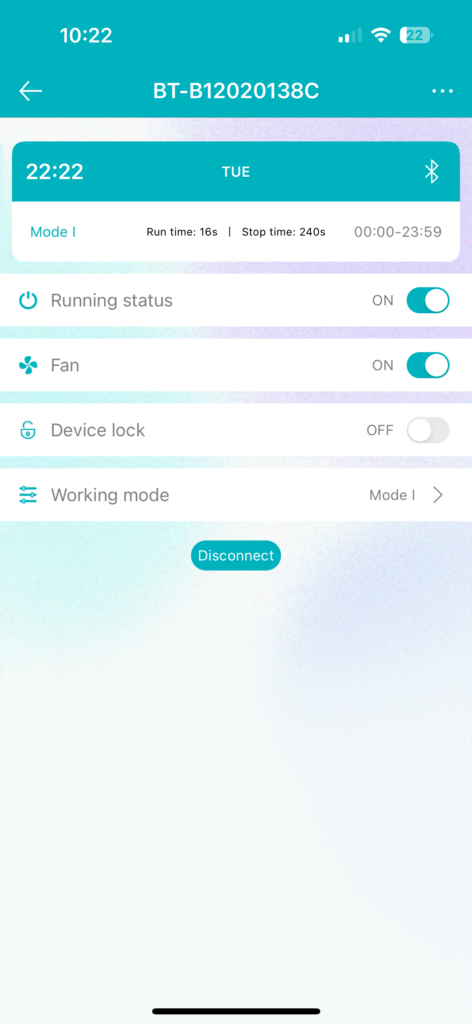
N. Once you click on “Device 01”, a new screen will appear, and you should see the following options:
1. Running state: this turns on and off the unit
2. Fan: do NOT switch off, always leave on.
3. Device Lock: This locks the buttons on your diffuser from responding by touch
4. Working Mode: This is the option you select when you are ready to program your unit.
5. When you are ready to program your unit, press the “Working Mode” option and your will see 5 options; which we call “Events”
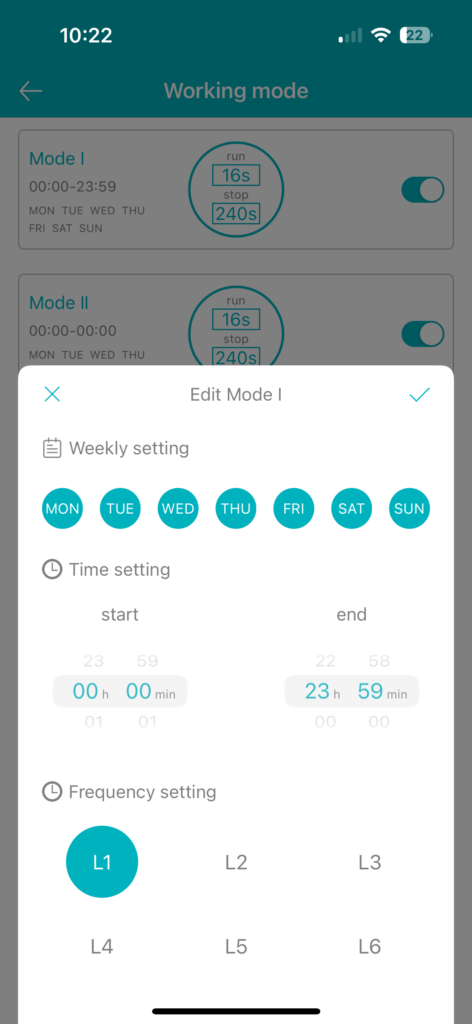
6. Click on the green/teal coloured circle for EVENT 1 (or the name that appears for you) to open another window display for you to program your first set the time for your diffuser.
7. When the window appears, you should see the abbreviated days of the week in one row. If they all are highlighted in the green/teal colour, that means it will disperse scent/aroma all days of the week for the time you will program.
8. Underneath the days of the week, you would see two sets of hours and minutes. This represents the time it will turn on the unit to disperse aroma and the time it should stop dispersing (SCENT ON/SCENT OFF).
This again runs on a 24hr time frame. Example: If you wish to have it disperse aroma from 11am – 4:15pm; the first time is 11:00 while the second time set would be 16:15.
9. Once you have established a time, you will then adjust the running time and pause time (SCENT WORK & SCENT PAUSE). This can run from a 5 second interval to 300 seconds. We recommend a low running or (SCENT WORK) time at around 15 – 25 seconds; this will allow enough time for the diffuser to pull the oil, atomize it and create enough aroma to fill the desired area.
10. Save your settings! You will press the “check mark” above the “SUN” (Sunday abbreviation) to save this setting.
11. You will repeat these steps if you wish to have multiple EVENTS for your diffuser to release aroma.
12. If you wish to add another diffuser, you will have to add equipment, follow the steps above again if this applies to you.
PLEASE NOTE! If your unit is not responding to your touch display, “press and hold SET for 10 seconds” until you hear it “beep once” and let go. This will unlock the touch options. To lock it again, you will press and “hold down SET” again for 10 seconds. If you are not sure if you did your settings correctly and want to revert back to factory settings – press and hold “MODE” down for 10 seconds until you hear it beep four (4) times and then let go. The factory settings are Monday – Sunday from 8am to 22:00 (10pm) work 005, pause 160.